Crock Pot Chocolate Candy

With the holidays quickly approaching, this is actually a recipe that I’ve seen floating around in several different places.  And naturally, since it’s floating around in several different places, there are several different recipes for it.  I’ve seen different types of chocolate, different nuts, added coconut, all kinds of stuff.  Well, I kept this batch really simple, and including things that I know my family would love.

crock pot chocolate candy

The original recipe I saw had twice the amount of ingredients, which makes a TON of these little guys.  This is a smaller batch than the original recipe I saw, and it still made over 50 of them…and I made them about the size of a standard cookie.  If you don’t have a crock pot, no need to worry!  You can melt the chocolates in a large, microwaveable bowl in increments of 45 seconds, stirring in between each one until all of the chocolates are melted, then stir in the peanuts and distribute them to wax or parchment paper.  Or, if you even prefer to melt your chocolate on the stove, you can do that as well on low heat, and proceed as usual.  What was so easy about this recipe was being able to walk away from it, not having to stand by the whole time.  So, whichever way you prefer to make it, go for it!

Crock Pot Chocolate Candy Recipe:

1 lb. almond bark white chocolate

12 oz. semisweet chocolate chips

12 oz. peanut butter chips

16 oz. dry roasted peanuts

Chop up almond bark, and combine all ingredients in crock pot on low.  Cover and cook for one hour, stir mixture.  Stir every 5-10 minutes after first hour until chocolate is melted and peanuts are coated.  Spoon clusters on to wax or parchment paper to set.  Store in airtight container at room temperature (these do not need to be refrigerated, and will actually cause them to have a whitish film if they are stored in the fridge).

Peanut Butter Fudge

As I’ve mentioned before, my family is a bunch of peanut butter nuts.  A lot of times, the in-laws in our family either chuckle or roll their eyes when yet another peanut butter dish comes into the house, and this would be a good example.

peanut butter fudge

The first time I made this was several years ago, before my baking experiments had exploded far beyond out of control.  It was around the holidays, and my aunt (who usually makes the peanut butter fudge), was out of town when the family was getting together.  Christmas without peanut butter fudge?  No way.  That can’t happen.  And to top it all off, I couldn’t find that recipe that she had given me…so I had to start searching.  This particular recipe is on allrecipes.com, and it is fantastic…and easy.  Double whammy there.  Honestly, I had forgotten all about this recipe until the holidays rolled around again and I had made the Cookies ‘n Cream Fudge.  So naturally, this had to be made as well.

Peanut Butter Fudge Recipe:

1/2 cup butter

2 cups brown sugar

1/2 cup milk

1 cup creamy peanut butter

1  teaspoon vanilla extract

3 cups confectioners’ sugar

Melt butter in a medium saucepan over medium heat.  Stir in brown sugar and milk.  Bring to a boil and boil for 2 minutes, stirring frequently.  Remove from heat.  Stir in peanut butter and vanilla.  Pour over confectioners’ sugar in a large mixing bowl.  Beat until smooth; pour into an 8×8 inch dish.  Chill until firm and cut into squares.

Buckeyes

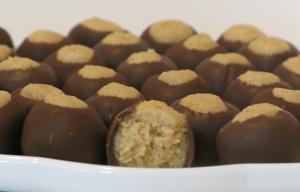
For some reason, I forgot all about these little desserts…until recently when I saw them posted on Facebook.  The second I saw them, the memories flashed back in my head of being a kid and shoving as many of these things into my mouth that I could get.  Although my family worships peanut butter (literally…my brother has two dogs named Peanut and Butter), we didn’t make these, so it was a special treat when they showed up somewhere for dessert.  The process of making these is similar to making Oreo Truffles, but these are actually easier to make.  Partly because the dipping process is faster, since the tops are open.  Using a toothpick also makes the process ten times easier, but since I wasn’t a big fan of the little toothpick hole in the top, I just let the peanut butter center soften slightly, then smoothed over the top to get rid of the little toothpick hole.  These were magnificent.

buckeyes

I usually try to take some sort of dessert to culinary school every couple of weeks for my classmates to indulge in, so these definitely made the list.  A girl in my class has Celiac Disease, so she’s missed out on several desserts that have come in because of their gluten content, and I feel guilty every single time.  So, when I showed up with these in my hand, I waved to her, smiled and said, “These are gluten-free!”  Not really sure if it’s a good thing or a bad thing that there are literally about 80 of these things in one batch.  They make a wonderful dessert finger food for gatherings…but watch out, because they’ll disappear quickly!

Buckeyes Recipe:

3/4 cup butter, softened

1 1/3 cups crunchy or smooth peanut butter

3 cups powdered sugar

1 package chocolate bark, melted

Beat butter and peanut butter in large bowl at medium speed with electric mixer until blended. Gradually add powdered sugar, beating until well-blended. Using a mini cookie scoop, scoop out mixture one by one onto parchment lined cookie sheet.  Place in refrigerator to harden, about 30 minutes.  Melt chocolate bark  in 30 second intervals in microwave, stirring in between each interval until completely melted.  Using a tooth pick or wooden skewer, dip each ball into chocolate–coating 3/4 of the ball. Place on wax or parchment paper, uncoated side up. Let stand until chocolate sets up. Store in airtight container at room temperature or in refrigerator.

Chocolate Covered Reese’s Stuffed Oreos

Wow, that’s a long name.  Well worth it though, considering all of the chocolate and yumminess inside.  When I made these, my brother and friend were at my house.  They were in another room, chatting away, with no clue as to what I was doing in the kitchen.  I figured it would be best to surprise them when I was finished.  My brother was getting ready to walk out the door when I stopped him, a big glob of chocolate on a paper towel in my hand, holding it out for him.  He immediately took it and looked at it.  “What is it?” he asked.  “Don’t worry, you’ll like it,” I responded.  He said, “Well, I’m sure I’ll like it, but what is it?”  “Just take a bite and you’ll see.”  It’s a good thing he trusts me.  He took a bite, and looked at the inside.  When I explained exactly what was inside the big glob of chocolate in his hand as he gobbled away, he looked at me and said, “I outta beat you for giving me this.  I guess this is lunch AND dinner!”  He still finished it off, and I got a good chuckle out of it.  When my friend ate it, she said, “This is STUPID good.”  I’m going to take that as a compliment.

IMG_4069

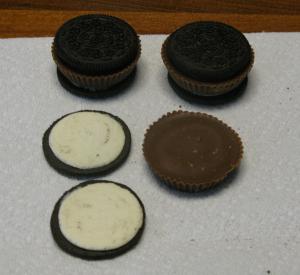
First, get your ingredients.  Double Stuf Oreo cookies, Reese’s Peanut Butter Cups, and dark chocolate melting wafers.  That’s it, just three ingredients.  Separate the Oreos, disgarding the side of the cooke that doesn’t have the cream.  Or, save it for something else.  Or, just eat it.

IMG_4070

Sandwich one of the peanut butter cups in between two of the cream-coated Oreo cookies.

IMG_4071

Melt your chocolate wafers in 15 second intervals in microwave safe dish (I use a coffee cup or glass measuring cup), stirring in between each interval.  Dip each cookie in melted chocolate using tongs, then place on wax paper for chocolate to harden.

IMG_4077

Eat, and enjoy.  Beware, because it’s a LOT of chocolate and tends to be quite rich…but I noticed that after I gobbled one down, I was talking myself out of eating another one and just staying away.  It worked long enough for them to get out of the house.  Whew!

Dark Chocolate Covered Apples

I’ve actually been meaning to make these for a while, but over the holidays was the perfect opportunity.  After putting together an edible gift basket for my in-laws, I kept looking at it and thinking,  Seems like it’s missing something.  Then, I realized that this would be the perfect addition.  And apparently it was a wonderful addition…  When I told my mother-in-law that the big lump of chocolate on a stick was a dark chocolate covered apple, she dropped her hands to her side, and her eyes got big.  Her jaw dropped, and she engulfed me in a big hug, and told me that she loved me.  Not only was I overly flattered, but very shocked that she loved them so much.  Mental note.  Might even be a good way to suck up to the in-laws in the future.  😉

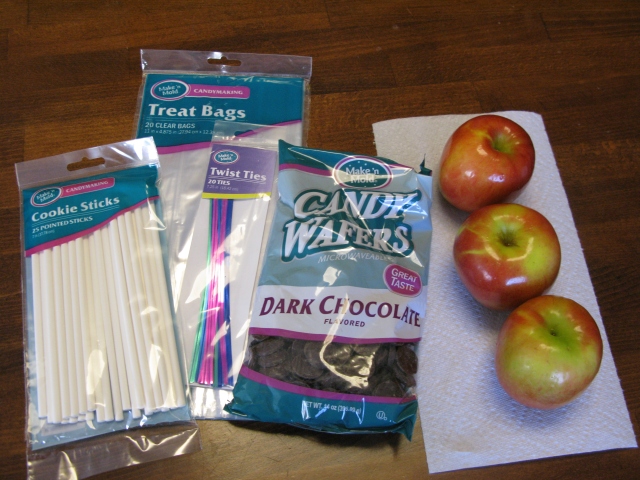
IMG_3653First, buy the necessary ingredients and materials.  I bought these at the local arts and crafts store.  For this project, I picked up cookie sticks, large treat bags, twistie ties, 1 bag of dark chocolate, and 4-5 small apples.

IMG_3654Insert the cookie sticks into the apples.  I used a hammer to tap them in…this keeps the sticks straight.  Push the sticks all the way down until they hit the bottom of the apple.

IMG_3655Melt the chocolate wafers in the microwave in 30 second intervals, stirring in between each interval.

IMG_3656Insert the apple into the melted chocolate, swirling around to completely cover apple with the chocolate.

IMG_3658Gently twirl the apple around, letting the excess chocolate fall off the apple.  This will help prevent extra pooling of chocolate at the bottom while setting.

IMG_3659Set chocolate covered apple on wax paper for chocolate to harden.  Try your best not to eat while chocolate is still liquid…you’ll need a bib.

IMG_3660How do you like dem apples?!  I love them!

IMG_3661When I packaged these, I trimmed down the treat bags so that the stick was coming out farther than the end of the bag.  Wrap twistie tie around to seal.  Store at room temperature.

Pretzel Turtle Candy Bars

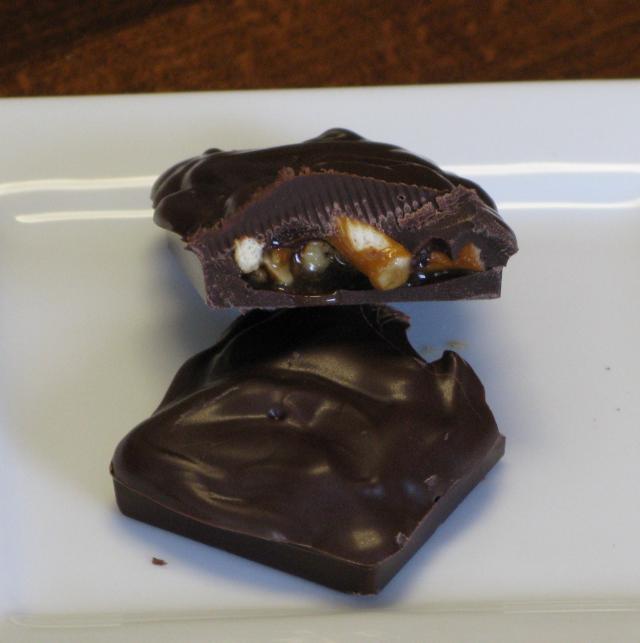
Homemade chocolate candy bars.  Yummmmmay.  I wanted to try out something that combined the flavors of sweet and salty, and here it is.

IMG_3537First, combine the pretzels, caramel, and honey roasted peanuts in a bowl.  Stir together well so that the caramel completely covers everything.

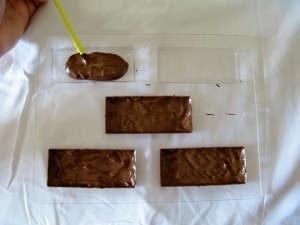
IMG_3538Next, melt your chocolate in the microwave in 30 second intervals, stirring in between each interval.  Do not overcook, the chocolate will scald and you won’t be able to use it, due to the yuckiness.  Place a small amount of chocolate in the mold, and use a paintbrush to smooth the chocolate out and brush up the sides of the mold.  Place in freezer for 3-4 minutes for chocolate to set.

IMG_3540Spoon a small amount of the mixture in the mold, move around so that the mixture is in a semi-thin layer on top of the chocolate, and evenly distributed throughout each bar.

IMG_3541Pour chocolate over the nut mixture, use the paintbrush to completely cover.  Place in freezer again for about 5 minutes.

IMG_3543Take out of freezer, then turn bars out onto flat surface.  Let the chocolate come to room temperature before trying to eat one…unless you want to crack a tooth.  😉  Enjoy!!

Pretzel Turtle Candy Bars Ingredients:

1/2 cup chopped honey roasted peanuts

1/2 cup pretzel pieces (I used pretzel sticks and broke them up)

1/4 cup caramel sauce (like the ice cream topping)

1 lb. dark chocolate

Chocolate Covered Almond Clusters

This is definitely my favorite little cure for having a sugar craving.  There’s enough sweetness in these little guys to satisfy your sweet tooth without overindulging…AND it packs protein.

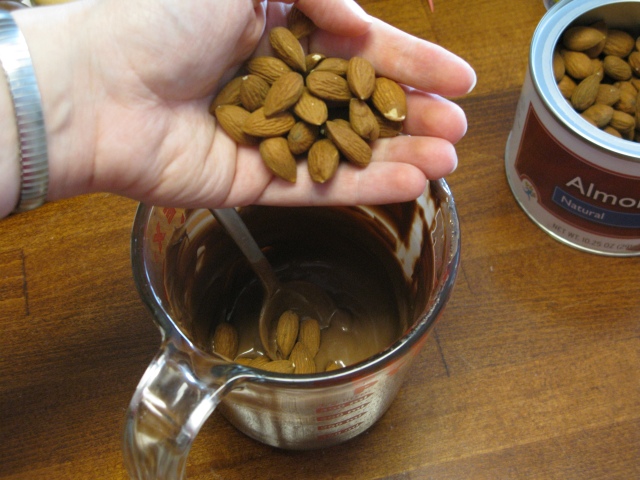
Here, I’m adding almonds to the melted chocolate.  When making any kind of nut clusters, I prefer for the nuts to be lightly coated in the mixture.  This way, there are more nuts in the clusters than chocolate.  Spoon the clusters on to wax paper for them to set.  One of the great things about making clusters is that you can decide how big or small you want them to be.  Here, I made some bigger ones, along with little bite sized clusters.  You also have a lot of flexibility with what you want to add to the clusters.  Almonds, peanuts, cashews, macademias, there are so many options!

Ta Da!!  I put these in the refrigerator to help them set faster.  Letting chocolate harden in the refrigerator or freezer gives that glossy, smooth look.  When making chocolates in bulk, I always stick them in the freezer since it saves so much time.  Just try not to eat them directly out of the freezer, since they get so hard.  Ouch!

Chocolate Covered Almond Clusters Recipe:

1 lb. almonds

8 oz. dark chocolate, melted

Microwave chocolate in 30 second intervals, stirring after each time and until completely melted (do not overheat, chocolate will clump).  Add almonds and stir until all almonds are covered.  Scoop out clusters by the spoonful, set on wax paper to harden.

Double Dipped Peanut Butter Oreos

Chocolate, peanut butter and oreos…Sign me up!!  What a great way to add a little more sugar  and sweetness to Oreos.  If that were actually possible.

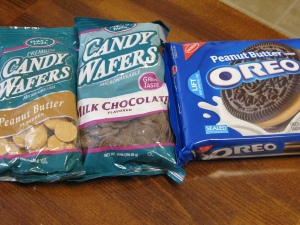
Here are the participants.  Peanut butter melting wafers, milk chocolate melting wafers, and peanut butter Oreos.  I’ve never tried the peanut butter oreos, so I picked them up at the store and decided to give them a shot.

First, melt the peanut butter wafers in 30 second intervals in the microwave, stirring in between to make sure the wafers don’t scald.  The peanut butter wafers are thicker than the milk chocolate.  Dip each Oreo halfway in, and set on wax paper to harden.

Next, melt the milk chocolate wafers.  Try to let it sit for a few minutes so it’s not too hot when you dip the Oreos back in, because it could melt the peanut butter already on them.  With these, I covered them about 3/4 of the way with the milk chocolate, to make sure there weren’t any open spaces on the cookie.

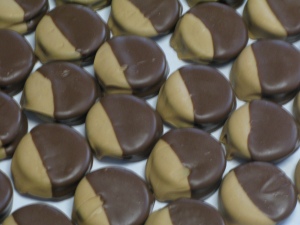
All done!  Make sure to let the chocolate harden for a while before diving into these guys…unless of course you want melted chocolate all over your hands.  Hmm, maybe that’s not so bad after all.

Hey, who took a bite?  Okay, it was me.  One of the many things you can do with these is pick out different chocolates to use, different Oreos, different cookies.  It’s great how easy these are to make, and I look forward to making something like this with my daughter when she gets older.  Great little chocolate activity for kids!

Peanut Butter Shortbread Bites

And, we’re back to peanut butter.  And mini shortbread cookies.  And milk chocolate.  Oh my.  These are great for a bite sized chocolate snack, but be careful…they’re addictive!

First, get some peanut butter and mini shortbread cookies.  The 100 calories snack size cookies are a perfect size for the mold that I bought from the chocolate store.

Melt your chocolate in 30 second intervals in the microwave until melted and smooth, stirring between each time put int he microwave.  Drop a small amount in each cavity, using a paintbrush to smooth and distribute the chocolate evenly throughout the cavities.

Next, put a small amount of peanut butter in each cavity.  I use a butter knife and a lollipop stick to transfer the globs of peanut butter into the mold.  Place each cookie on top of the peanut butter.

Cover each cookie with a small amount of chocolate, using the paintbrush to completely cover the cookie.  As it turns out, there were 18 cavities in the mold, and 18 cookies in the packet.  It was fate, they were meant to be together.  😉

Put in the freezer to set, then take the chocolates out of the mold.  And again, watch out for these little guys!  They’ll get you hooked!

S’mores Bars

I love s’mores, but sitting in front of a camp fire in the middle of the day while it’s 95 degrees outside isn’t all that appealing when I develop a craving for one.  So, here’s the compromise.

Grab some honey graham crackers from the store, along with some marshmallow creme to be inside the chocolate bar.

Put a dab of chocolate in the mold, and use a paint brush to evenly distribute along the bottom and up the sides.  Set in the freezer for a couple of minutes to set.

I had to cut the graham crackers to fit the mold I have, which is a little bit longer than a standard rectangle of the graham crackers…but that means more of a bar!  Put some of the marshmallow creme in the bottom, and try to spread somewhat evenly along the mold.  Otherwise, if you just put one big blob, it’ll ooze out the sides instead of going all the way across, and this helps it be more evenly distributed throughout the bar.  Place the graham cracker on top of the creme.

Next, cover the top with the melted chocolate.  Try to look over and make sure there aren’t any big gaps with the chocolate doesn’t cover, this keeps the bar fresh inside.

Put back in the freezer to set, and they’re done.  These babies are very delicious, and depending on what mold you want to use, you can decide how big or small you want the bars to be.  I’ll enjoy these out by the pool if I want…but will have to gobble them up fast so the chocolate won’t melt.  Good enough excuse for me!

Here is another close-up picture taken with a different mold that I used.  This is the actual candy bar chocolate mold, which personally I think works a LOT better for this particular candy bar.  It’s deeper, so you can fit more of the marshmallow creme inside, and it also looks better.  I bought this candy bar mold at Hobby Lobby, and I’m not positive but it may be sold at other arts and crafts stores in the chocolate and candy mold section.


Click HERE for a chocolate mold similar to this that is good for these bars.  You can cut the size of the graham crackers to fit any size bar you’d like to make!

Happy Cookies!

These cookies are a combination of milk chocolate, yellow (vanilla) chocolate, peanut butter and a Ritz cracker…no wonder they’re smiling!  Taking a bite of these cookies will actually make your taste buds smile even bigger.

I bought the mold for these at AC Moore.  Technically, they’re for lollipops, but I wanted to use them as cookies.  Here is the chocolate I used.

Melt the chocolate in 30 second intervals, stirring between each time.  Usually, it only takes 2 times in my microwave for the chocolate to melt.  Don’t microwave for too long or too much, because the chocolate will scald and be chunky.  I use coffee cups for size and convenience.

Take a toothpick and to detail the eyes and mouth of the smiley face.  Put the mold in the fridge for about 30 seconds, long enough for the chocolate to set.

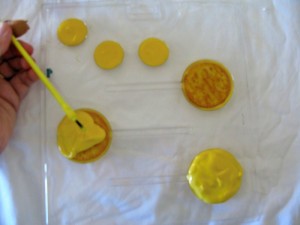
Try to melt the yellow chocolate first and let it sit for several minutes before you pour it on top of the milk chocolate, because the warm chocolate will melt the set chocolate, causing it to run together.  All that hard work smudged!  Use a paintbrush to evenly distribute a small amount of the yellow chocolate over the face.  Stick in the freezer for a couple of minutes for the chocolate to set.

Take about 1/2 tablespoon of peanut butter (more if you’d like) and place it in the center.  Top with a Ritz cracker and press down.

Cover with chocolate, spreading evenly with the paintbrush.  Once they’re completely covered, put in the freezer for a few minutes until set.

All done!  These little guys are so cute, it’s hard not to smile at them before stuffing one in your mouth.  Dee.  Lish.